Setting Up: Staff Details
The Staff Details tab is where you manage your team members and their specific attributes, preferences, and constraints for the roster period. This information is crucial for the AI to generate a fair and compliant roster.
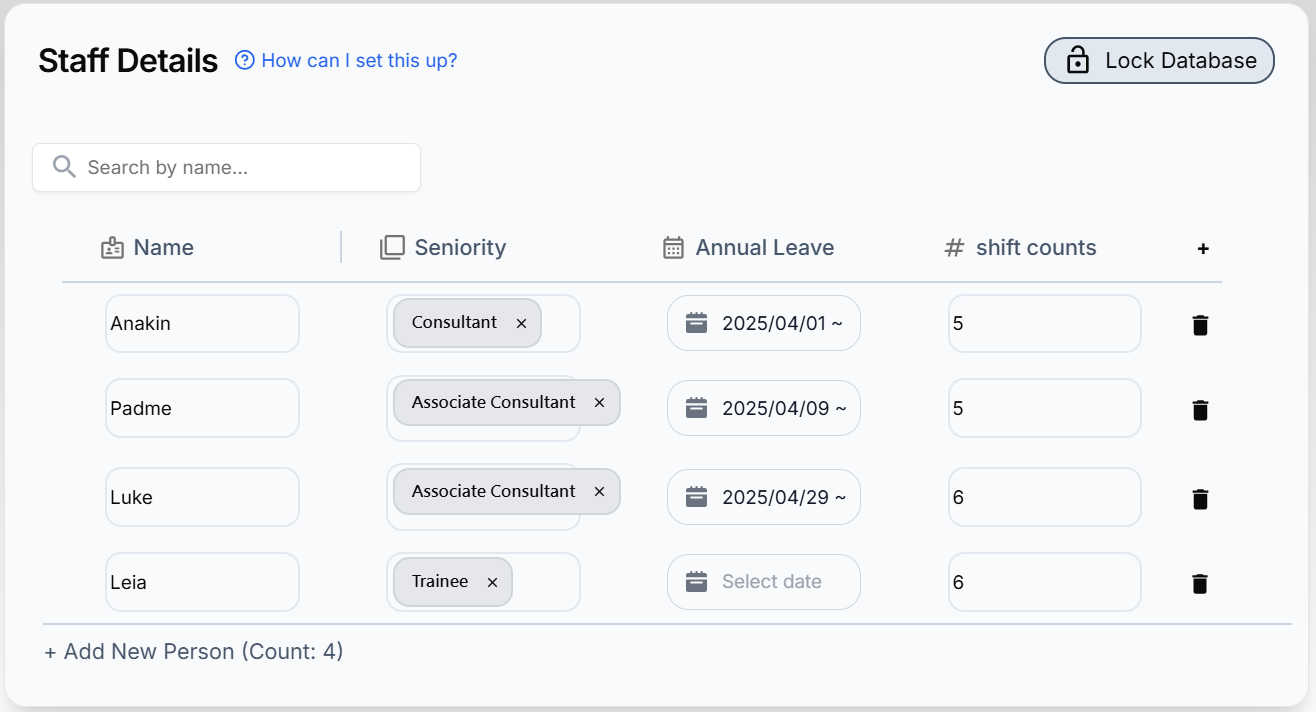
Start by adding each staff member using the "+ Add New Person" button at the bottom of the table. Their name is the only required field initially.
To add specific information about your staff (like seniority, leave, or preferences), you need to add columns to the table. Click the "+" button in the table header (far right) to open the "Add Column" panel.
When adding a column, you'll choose a "Type". This determines how data is entered and used:
Number
For numerical data. Often used in rules for minimum/maximum shift counts.
Select
Creates a dropdown list of predefined options. Ideal for categories like Seniority, Team, or Skill Level. Used for grouping in fairness rules.
Dates
Allows selecting single dates or date ranges using a calendar. Perfect for recording Annual Leave, Study Leave, or specific unavailable dates.
Example: Recording Annual Leave
Dates, Name = Annual Leave.2. For a staff member, click their cell in the "Annual Leave" column.
3. Select the start and end dates of their leave from the calendar.
4. Rule Setup: The system automatically prevents assignments during the leave dates entered here. To also prevent assignments on the day(s) before leave, go to the Rules Tab and add the rule: "Shift must not be assigned within x days before their leaves", linking it to this "Annual Leave" column.
Example: Defining Seniority
Select, Name = Seniority.2. Click the "Seniority" column header, choose "Edit Options".
3. Add options like "Consultant", "Associate Consultant", "Trainee".
4. For each staff member, select their seniority from the dropdown.
5. Rule Setup: This column doesn't require a specific rule setup, but when you're setting up fairness rules per seniority, you can tell the AI on the left side to include people from each seniority level.
Example: Setting Max Shifts Per Person
Number, Name = Max Calls.2. Enter the maximum number of call shifts each person should ideally work (e.g.,
5).3. In the Rules tab, add a rule like "Maximum number of shifts per person" and link it to this "Max Calls" column.
Example: Handling Specific Requests
Dates, Name = Shift Requests. 2. For a staff member, click their cell in the "Shift Requests" column.
3. Select the date and the specific shift they are requesting OFF (e.g., "May 15th - 1st Call - OFF").
4. Alternatively, select the date and shift they request TO WORK (e.g., "May 20th - 2nd Call - WORK").
5. Rule Setup: Go to the Rules Tab and add the rule: "Shift must be assigned on request.", linking it to this "Shift Requests" column. By default, this is a hard constraint (must be honored). Paid users can configure this rule as a soft constraint (priority) to only honor requests if possible without violating other hard rules.